P.S I love you Mailbox
Sweet DIY
mail boxes are a great idea to try for something different then the boring name
and adress on every regular mailbox. The mailbox I created was simple to do and
fun! I loved the way it turned out!
I thought
this mailbox would be perfect for wedding cards, a decoration, or used as a
mailbox.
DIY Mailbox Turtorial
Step 1: First you will have to puchase a
plain mailbox from any hardware store or even garage sale. Mailboxes are
usually around $20-30 dollars.
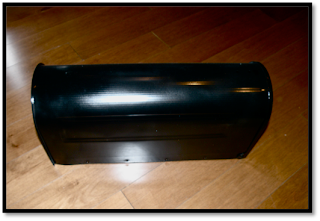
Step 2: The second step would be to paint
your mailbox black. I did this with black spray paint because it drys fastern
and doesn’t leave any brush storkes. You will also have to spray paint the
screws, bolts, handles, and the piece that holds the flag up.
This is what it should look
like after is has been spray painted.
Step 3: Now its time to put the quote onto the mailbox, this is done very easily. You will need tracing paper that is available at any craft stores. You will also need to print the quote onto a banner size using Microsoft word. The font size should be around 300, and you can choose any font style you prefer. Now you need to place the quote in banner size on the mailbox and tape it there so that it doesn’t move. Then slide a piece of tracing paper underneath the quote. Now with a pencil trace the quote onto the mailbox. The tracing paper allows the quote to be transferred onto the mailbox.
This is what
the quote should look like after its been trasfered onto the mailbox.
Step 4: Now that the quote is traced onto
the mailbox you can start painting! You can choose any type of paint colors you
would like but make sure its perm enamle paint. The colors I chose were grass green,
sunny yellow, parry purple, and hot pink. Also use very fine, squared, paint
brushes, they will help you with the edging. They can be purchased at any craft
store.
Step 5: Now just take your time and paint in
between the lines, just like coloring. Do two to three coats, until the quote looks
bold.
Step 6: After painting the quote onto the
mailbox, spray the mailbox with a clear coat of varnish. This pervents the
paint from chipping and rusting, it also makes the mailbox look shiny!
Step 7: Just for extra I painted the mailbox
flag yellow, I did this with spray paint, and I also added initals to the lid.
I hope you have as much as fun as I did painting this pretty mailbox!


Your blog provided us with valuable information to work with. Each & every tips of your post are awesome. Thanks a lot for sharing. Keep blogging, painted mailboxes beach
ReplyDelete