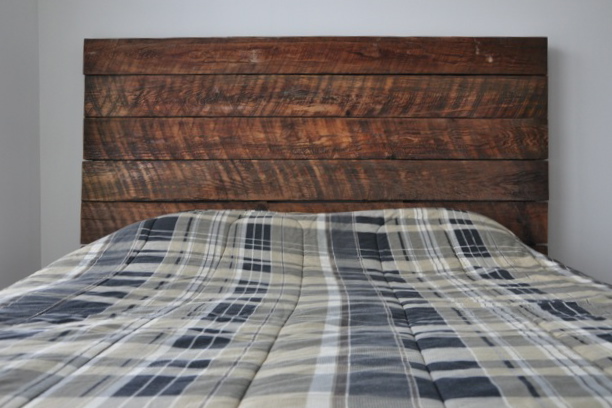
DIY Barn Board Headboard
 Over the past few weeks I have been putting together a
headboard for my double size bed. I came across this idea through Pinterest. I
was looking into purchasing a new headboard but they were too expensive, so I
did some researching and came across a DIY headboard. I choose to create a
rustic look using old barn boards that I found at my granddads farm.
Over the past few weeks I have been putting together a
headboard for my double size bed. I came across this idea through Pinterest. I
was looking into purchasing a new headboard but they were too expensive, so I
did some researching and came across a DIY headboard. I choose to create a
rustic look using old barn boards that I found at my granddads farm.
This project is really inexpensive and easy to do!
Items you’ll need to create a DIY barn board headboard:
- 9 Barn boards
- Saw
- Screw Gun
- Screws
- Wire brush
- Electric Sander
- Chestnut Stain
- Varnish
- Paintbrush
Step 1: Once you have 9 barn boards, set 2 aside. Use the
other 7 boards and measure them to be about 1 foot longer then your bed. Once the
boards are measured at the same length cut them. Use the other two boards and
place them vertical on the back of the 7 boards. Use a screw gun and screw each
board into the two vertical boards.
Step 2: Once the boards are all screwed together you can now
see the outline of what your headboard is going to look like. My barn boards
were dirty so I used a wire brush, kind of like a bbq brush and brushed all the
dirt off.
Step 3: Once all the dirt is completely off the headboard you
can now start painting. Grab your paintbrush and chestnut stain and do 2 to 3
coats of stain each time a layer has dried.
Step 4: Once all the stain is dried, do 1 coat of varnish.
You can also do 1 coat of varnish on the back of your headboard too.
EXTRA: There are multiple ways to hang the headboard against
the wall. You can screw 2 large hooks in the back of the headboard and mount the
headboard on the wall or you can add legs to the headboard.
Hope you guys love this project just as much as I did!
No comments:
Post a Comment